School Profile Settings
The School Profile Settings page is where you manage your school’s core information — the details that appear across the platform and that help your chatbots give accurate, school-specific responses. The page has three sections: Basic Information, School Profile, and Danger Zone.
For named contacts and notification emails (safeguarding, absence reporting, etc.), see the Contacts page in the sidebar — these moved out of School Profile Settings into their own page. To manage physical sites, see School Sites.
How to Get There
From the School Dashboard, click School Profile in the left sidebar under Your School.
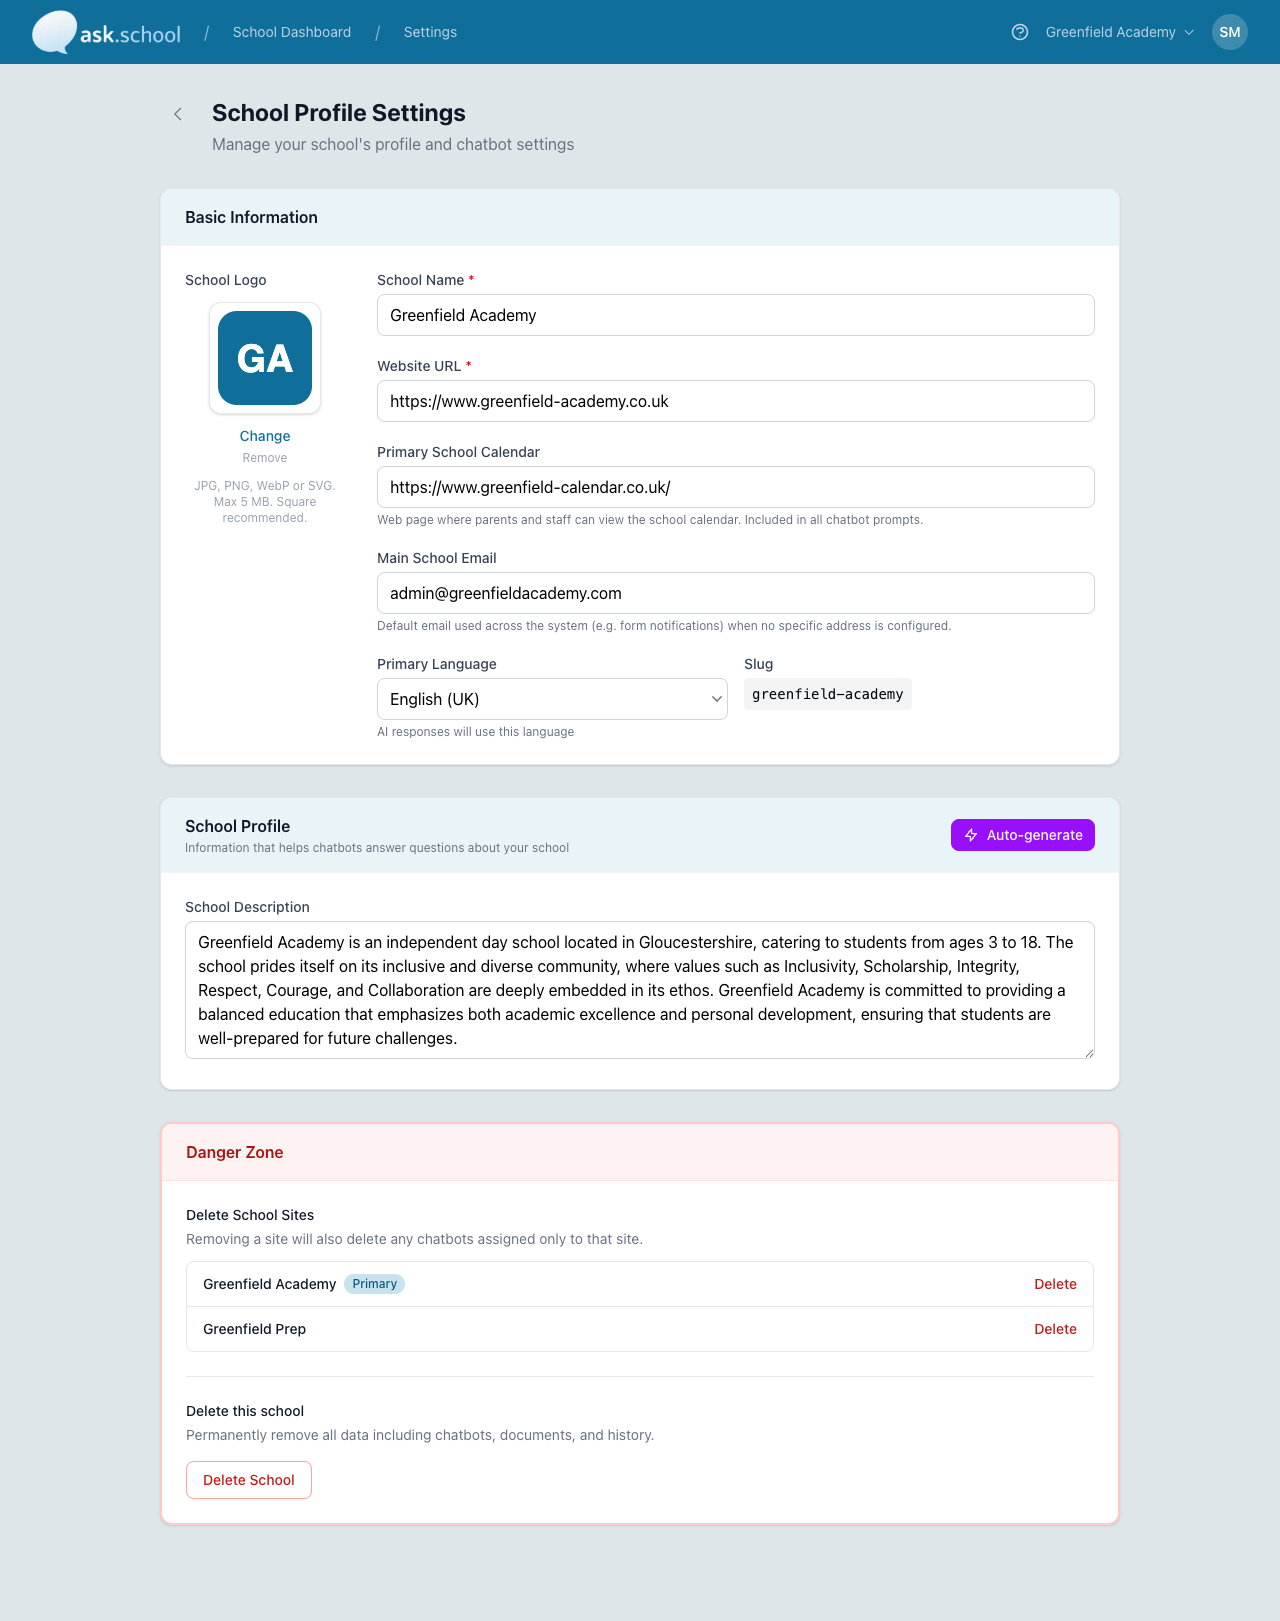 The School Profile Settings page
Basic Information
The Basic Information section contains your school’s core details:
- School Logo — Upload a square image (JPG, PNG, WebP, or SVG, max 5 MB). Appears in the chat interface and on the home-screen icon when installed as an app. Use Change to replace it or Remove to clear it.
- School Name (required) — The name displayed across your chatbots and dashboard.
- Website URL (required) — Your school’s main website address. Used by Website Content discovery and by the chatbot when answering questions about your school.
- Primary School Calendar — Web page where parents and staff can view your school calendar. Included in all chatbot prompts so chatbots can refer users to it.
- Main School Email — Your school’s general office email. Used as the default destination for form notifications and system emails when no more specific address is configured.
- Primary Language — The language your chatbots will use when responding. Choose from English variants (UK, US, Australia, Ireland, Canada) and other supported languages.
- Slug — Your school’s unique URL identifier (e.g.
greenfield-academy). Set when the school is created — cannot be changed.
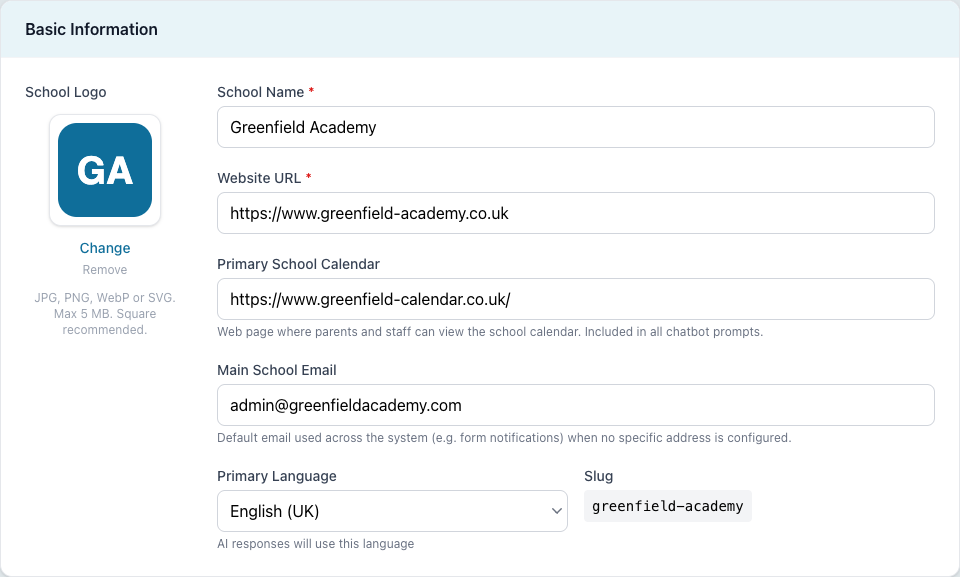 The Basic Information section
School Profile
The School Profile section is a free-text description of your school — its history, values, specialisms, and what makes it distinctive. The AI uses this to give school-specific answers across every chatbot.
Auto-generating a profile
If you don’t want to write it from scratch, click Auto-generate at the top of the section. Ask.School will:
- Visit your school’s website and read the key pages
- Extract useful information — ethos, values, key staff, facilities, admissions info
- Create a written profile summarising your school
The profile usually takes 30–60 seconds to generate. Review the generated text and edit anything that needs correcting before saving.
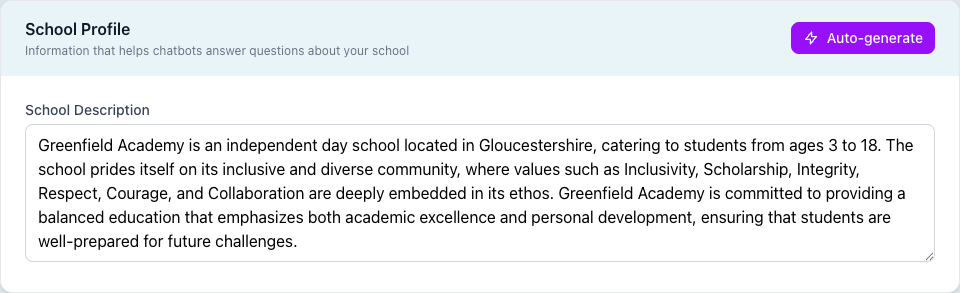 The School Profile section with the Auto-generate button
Danger Zone
At the bottom of the page is the Danger Zone, which contains permanent, destructive actions for the school.
Delete School Sites
Lists every site attached to this school with a Delete link beside each one. The primary site is marked with a Primary badge. Removing a site also deletes any chatbots assigned only to that site.
Delete this school
Permanently removes the entire school and all associated data — chatbots, documents, conversations, history, and everything else. This action cannot be undone. Click Delete School and confirm to proceed.
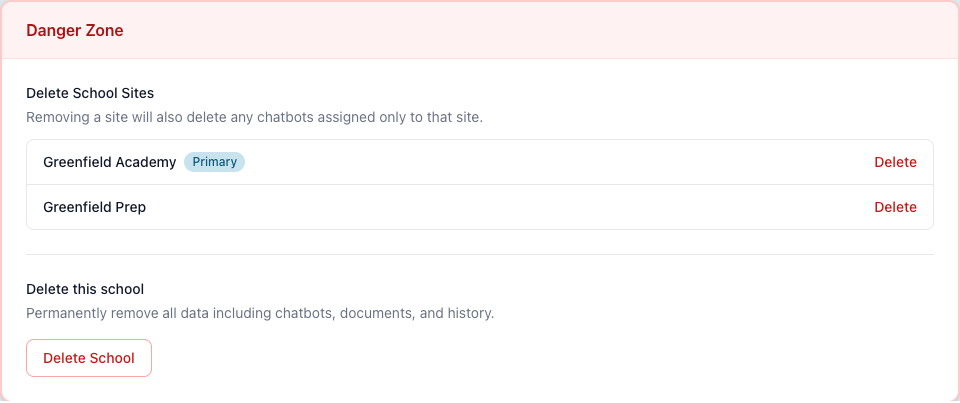 The Danger Zone section
Saving Changes
Whenever you edit a field on this page, an Unsaved changes bar appears across the bottom of the page with Cancel and Save Changes buttons. Click Save Changes to apply your edits, or Cancel to discard them.
Good to Know
- The Auto-generate button needs your website URL to be set first, and the website must be publicly accessible.
- Contact details extracted by Auto-generate are added to the relevant fields if they are currently empty — they don’t overwrite values you’ve already entered.
- The Slug is permanent — if you want a different URL, you’ll need to delete the school and create it again. Plan it carefully when first creating the school.
- Safeguarding emails, absence reporting emails, and other named contacts now live on the Contacts (Contacts & Notifications) page in the sidebar, not here.
- To add additional physical sites for your school (e.g. a prep site and a senior site), use the School Sites sidebar item — see Multiple Schools & Sites.
Next Steps
- Documents — Upload policies, handbooks, and other documents
- School Knowledge — Add knowledge topics for common queries
- Website Content — Bring pages from your school website into the chatbot
- Multiple Schools & Sites — Manage multi-site schools and add additional sites
- Creating Chatbots — Set up your first AI chatbot