Creating Chatbots
Chatbots are the AI assistants that your staff, students, and parents interact with. Each chatbot has its own name, branding, instructions, and access controls. You can create as many chatbots as you need (e.g. one for the office, one for IT, one for prospective parents) and configure each independently.
How to Get There
Chatbots are managed from the right-hand panel on the School Dashboard — see The Dashboard for an overview.
Creating a Chatbot
From the dashboard, click + Add Chatbot at the top of the Chatbots panel (or the Add New Chatbot tile at the bottom of the chatbot list). You’ll be taken to the General tab of the new chatbot’s editor.
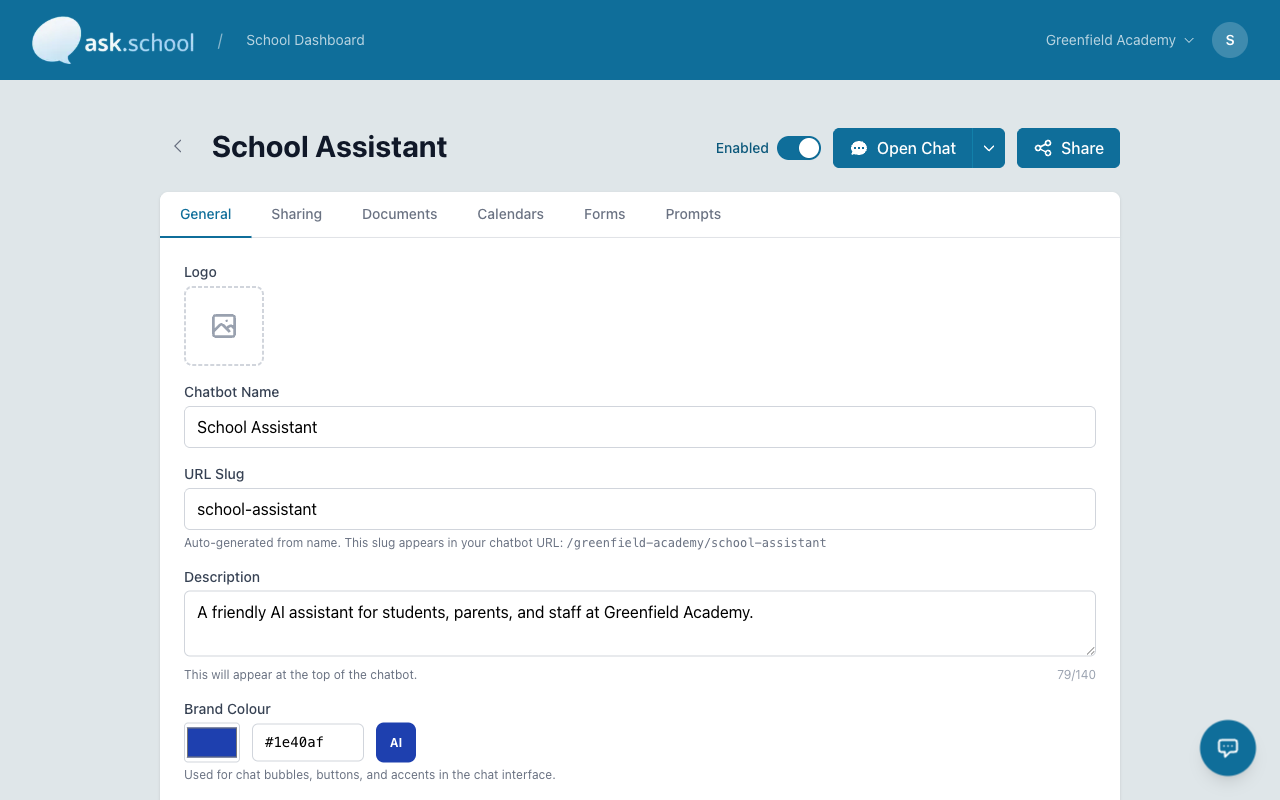 The General tab of the chatbot editor
The Editor Tabs
A chatbot’s editor is split into eight tabs at the top:
- General — Identity, role template, system prompt, welcome message
- Sharing — Audience access and the user access link (see Sharing & Access)
- Knowledge — Which school knowledge topics this chatbot uses
- Links — Useful links available to this chatbot
- Documents — Documents attached just to this chatbot (see Chatbot Documents)
- Forms — Forms this chatbot can offer (see Chatbot Forms)
- Suggestions — Prompt suggestions shown to users when they start a chat (see Prompt Suggestions)
- Stats — Conversation and usage statistics for this chatbot
The page header also has:
- Enabled toggle — Turn the chatbot on or off without deleting it
- Open Chat — Open the chatbot in the chat interface
- Masquerade — View the chatbot as a specific user role for testing
- Share — Quick access to the user access link
General Tab Fields
The General tab contains the chatbot’s identity and instructions:
- Logo — Upload a square image to brand the chatbot. Appears in the chat interface and on home-screen icons when installed as an app.
- Chatbot Name — A clear name like “School Assistant” or “Sixth Form Helper”.
- URL Slug — Auto-generated from the name. Forms part of the chatbot URL (e.g.
/your-school/school-assistant). Edit it before saving if you need a custom slug. - Description — A short summary of what this chatbot does. Shown at the top of the chat interface and on the dashboard.
- Brand Colour — A hex colour for chat bubbles, buttons, and accents. Click the AI button to suggest a colour from the chatbot’s name and description.
- Role (required) — Pick a starting template that pre-fills the system prompt:
- Reception — A virtual school front office assistant for everyday queries from parents, students, and visitors.
- Technical Support — Common technical support questions for staff and students. Knows about Microsoft 365, Google Workspace, Apple, Kerboodle, Cavna, and similar.
- Q&A — A generic Q&A template you can adapt freely.
- System Prompt — Instructions that define how the AI assistant behaves. Edit the role template to suit your school.
- Welcome Message — The greeting shown when someone starts a new conversation.
- Include School Knowledge — When on, the chatbot uses your School Knowledge topics in its responses (subject to each topic’s audience filter).
 Role templates, system prompt, welcome message, and the Include School Knowledge toggle
At the bottom of the page, Delete Chatbot permanently removes the chatbot’s configuration. Use the Enabled toggle in the page header instead if you only want to hide it temporarily.
Access Control
Chatbots usually require users to sign in. Use the Sharing tab to choose which audiences (Staff, Parents, Students) can access the chatbot and to copy the user access link.
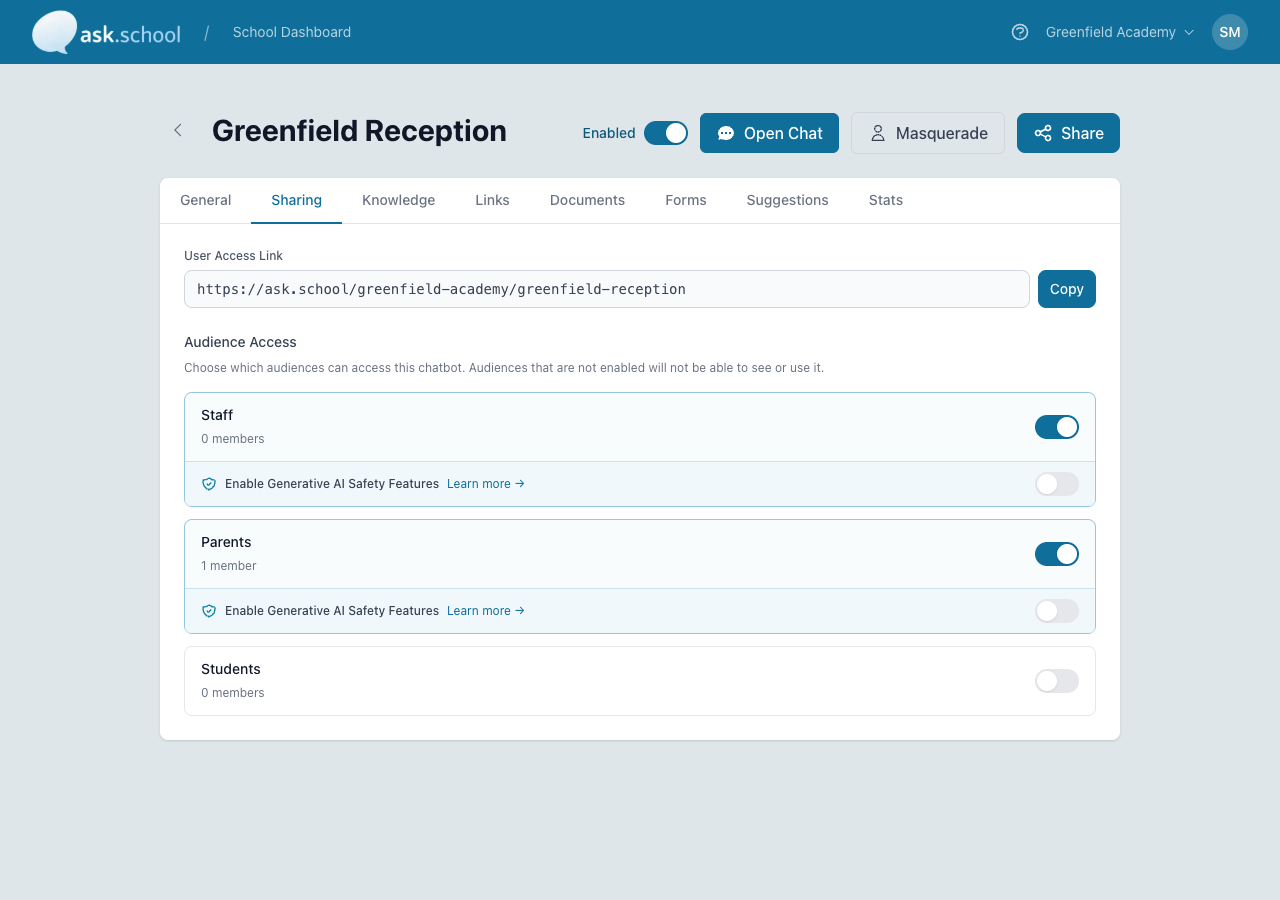 The Sharing tab with the user access link and audience access toggles
Managing Chatbots
From the dashboard’s chatbot list you can:
- Open a chatbot — Click any card to open the editor
- Reorder — Drag the handle on the left of each card to reorder. The top chatbot is shown first to users at the school’s public link unless one is marked Primary.
- More actions — A three-dot menu on the right with options to chat, set as primary, duplicate, or delete
Deleting a chatbot does not delete conversation history or uploaded documents, but it does remove the chatbot's configuration, prompt suggestions, and links/documents/forms attached at the chatbot level.
Good to Know
- All chatbots in your school automatically inherit your school’s profile, school knowledge, documents, useful links, calendars, and school day — unless filtered by audience or site.
- You can create chatbots for different audiences — e.g. one for parents, one for students, one for staff — each with different instructions and access controls.
- Chatbots may be disabled if your subscription has lapsed, your free trial has expired, or invoices are overdue. Resolve the billing issue to re-enable them — see Billing & Subscription.
- The Masquerade button is useful for previewing what a Staff, Parent, or Student would see — handy when testing audience-filtered topics.
Next Steps
- Sharing & Access — Choose which audiences can use the chatbot
- Chat Interface — Test your chatbot
- Chatbot Documents — Attach documents to individual chatbots
- Prompt Suggestions — Configure suggested prompts
- School Knowledge — Add knowledge topics shared across chatbots