The Dashboard
The School Dashboard is the first page you see when you open your school in Ask.School. It gives you quick access to every management page in the left sidebar and an overview of your chatbots in the main panel.
How to Get There
Click the Ask.School logo or the School Dashboard breadcrumb link from any page to return to the dashboard.
Overview
The dashboard is split into two main areas:
- Left sidebar — Navigation links to all your school’s settings, knowledge, safeguarding, analytics, users, and integrations — organised into sections
- Right panel — Your chatbots at a glance, with quick actions to open, edit, reorder, or create new ones
If your account has any notices (such as a free trial countdown or billing alerts), they appear above the page content.
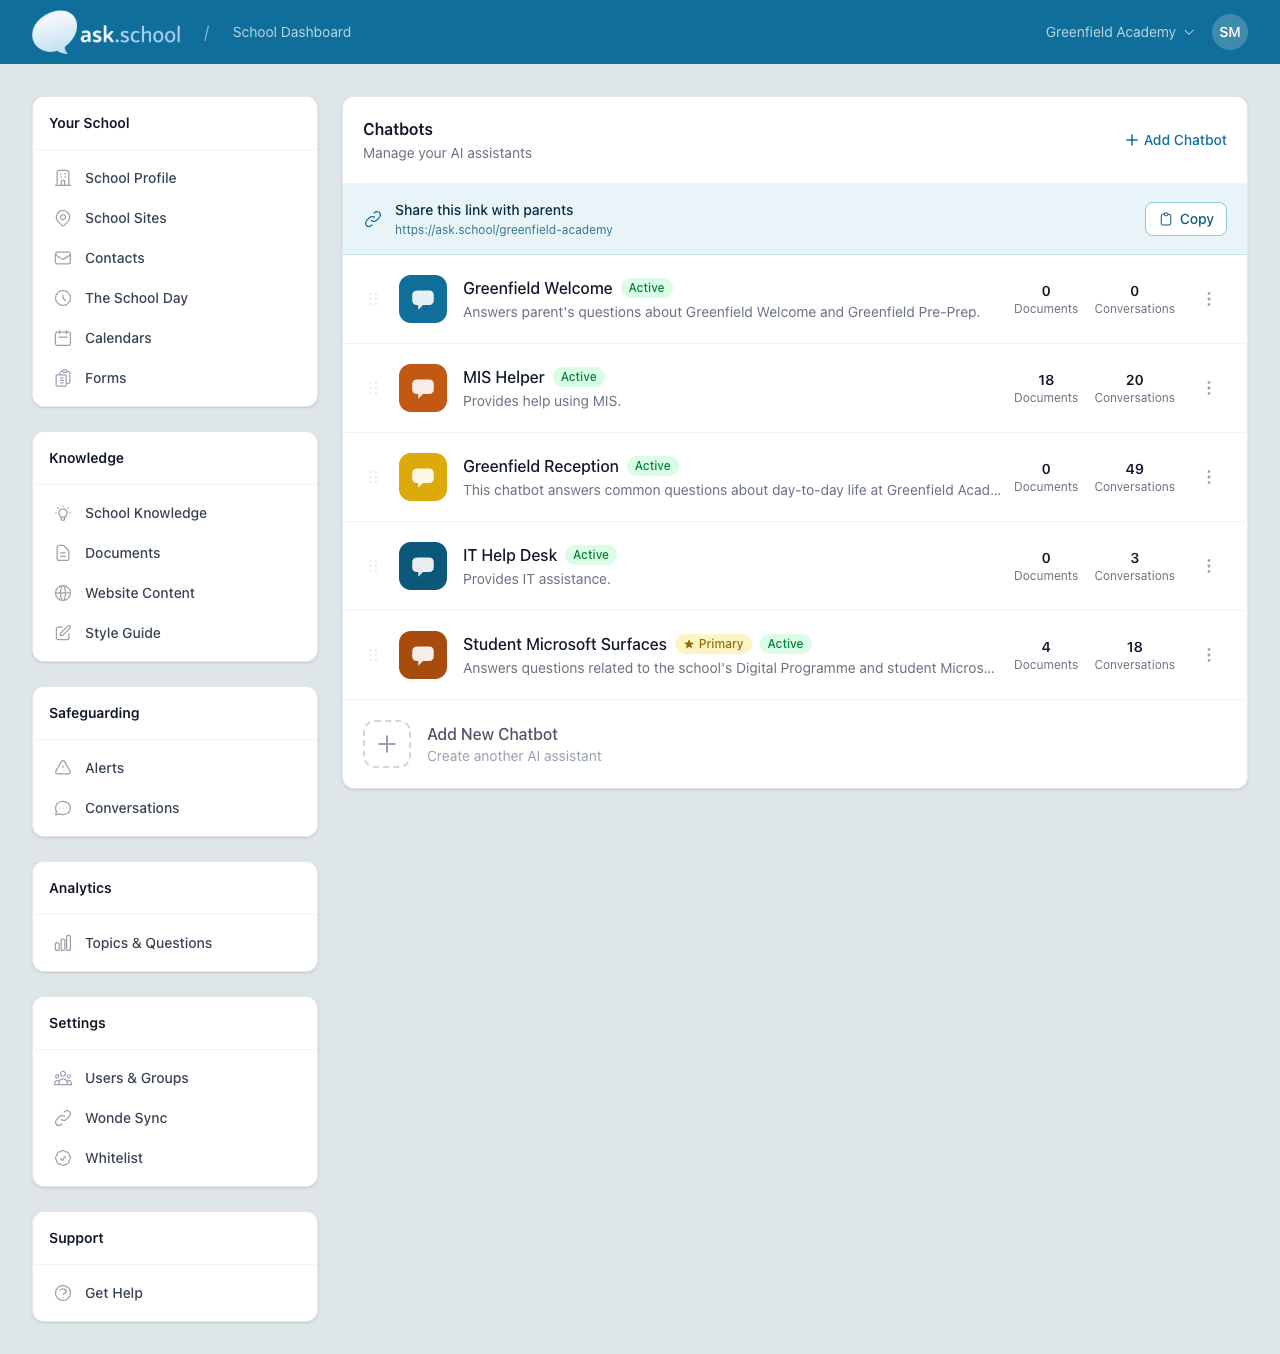 The School Dashboard with sidebar navigation on the left and the chatbots panel on the right
Sidebar Navigation
The left sidebar organises your school’s pages into six sections:
Your School
The pages that describe your school itself — its profile, locations, contacts, and timetable:
- School Profile — School logo, name, website URL, primary calendar URL, main school email, preferred language, and a description of your school used by the AI
- School Sites — Add additional physical locations within the same school (e.g. lower and upper school)
- Contacts — Named contacts and notification emails the chatbot can refer users to. Page heading is Contacts & Notifications and is split into General, Safeguarding, and Other contacts.
- The School Day — Timetable schedules and time slots
- Calendars — Connect ICS/iCal feeds for events and term dates
- Forms — Embedded forms the chatbot can offer to users (e.g. absence reporting, contact forms)
Knowledge
Everything that feeds the chatbot’s answers — what it reads from, what it prioritises, and how it sounds:
- School Knowledge — Question-and-answer topics for common queries
- Documents — Upload PDFs, Word documents, and other files for the chatbot to reference
- Website Content — Discover and include pages from your school website
- Style Guide — Set the tone of voice for chatbot responses
Safeguarding
- Alerts — Review safeguarding concerns flagged by the AI
- Conversations — Browse and review all chatbot conversations
Analytics
- Topics & Questions — See what users are asking about most often, and which topics are trending
Settings
- Users & Groups — Manage staff, student, and parent accounts and permissions
- Wonde Sync — Connect your MIS to automatically sync users and groups
- Whitelist — Mark words or phrases that look like personal data but should be treated as safe (e.g. school product names that resemble surnames)
Support
- Get Help — Link to this documentation site
Chatbots Panel
The right side of the dashboard lists all your AI assistants. Above the list, a Share this link with parents banner shows the public URL where anyone with the link can chat with your school’s primary chatbot — click Copy to copy it.
Each chatbot row shows:
- Drag handle — Click and drag to reorder your chatbots. The top chatbot is shown first to users.
- Logo and name — Your chatbot’s branding
- Status badge — Whether the chatbot is Active or Inactive
- Primary badge — A starred Primary badge marks the chatbot that opens by default at your school’s public link
- Description — A short summary of what the chatbot does
- Documents — How many documents are attached
- Conversations — How many conversations have taken place
- More actions — A three-dot menu on the right with options to chat, edit, duplicate, set as primary, or delete
 A chatbot card showing status, description, document and conversation counts, and the more-actions menu
To open a chatbot’s settings page, click anywhere on its card. To create a new chatbot, click + Add Chatbot at the top of the panel, or click the Add New Chatbot tile at the bottom of the list.
Top Navigation Bar
The top navigation bar appears on every page and includes:
- Ask.School logo — Click to return to the dashboard
- Breadcrumb trail — Shows your current location (e.g. School Dashboard / School Profile). Click any breadcrumb to navigate back.
- School switcher — If you manage multiple schools, click your school name to switch between them
- User menu — The circle icon on the far right opens your account menu with options to manage your profile, security settings, or sign out
 The top navigation bar with breadcrumb trail, school switcher, and user menu
Next Steps
- School Profile Settings — Configure your school’s basic information and profile description
- Creating Chatbots — Set up a new AI chatbot
- Managing Users — Invite staff, students, and parents
- Multiple Schools & Sites — Manage more than one school from a single account