Forms
The Forms page (page heading: Form Templates) is where you manage the embedded forms your chatbots can offer to users. When the chatbot recognises a user wants to do something a form covers — report an absence, submit feedback, log a help-desk ticket — it offers the matching form inline in the chat.
Forms come in two flavours:
- Global Templates — Curated by Ask.School and available to every school. You can set a notification email and a custom confirmation message per template.
- Your Form Templates — Custom forms you create for your own school’s needs.
How to Get There
From the School Dashboard, click Forms in the left sidebar under Your School.
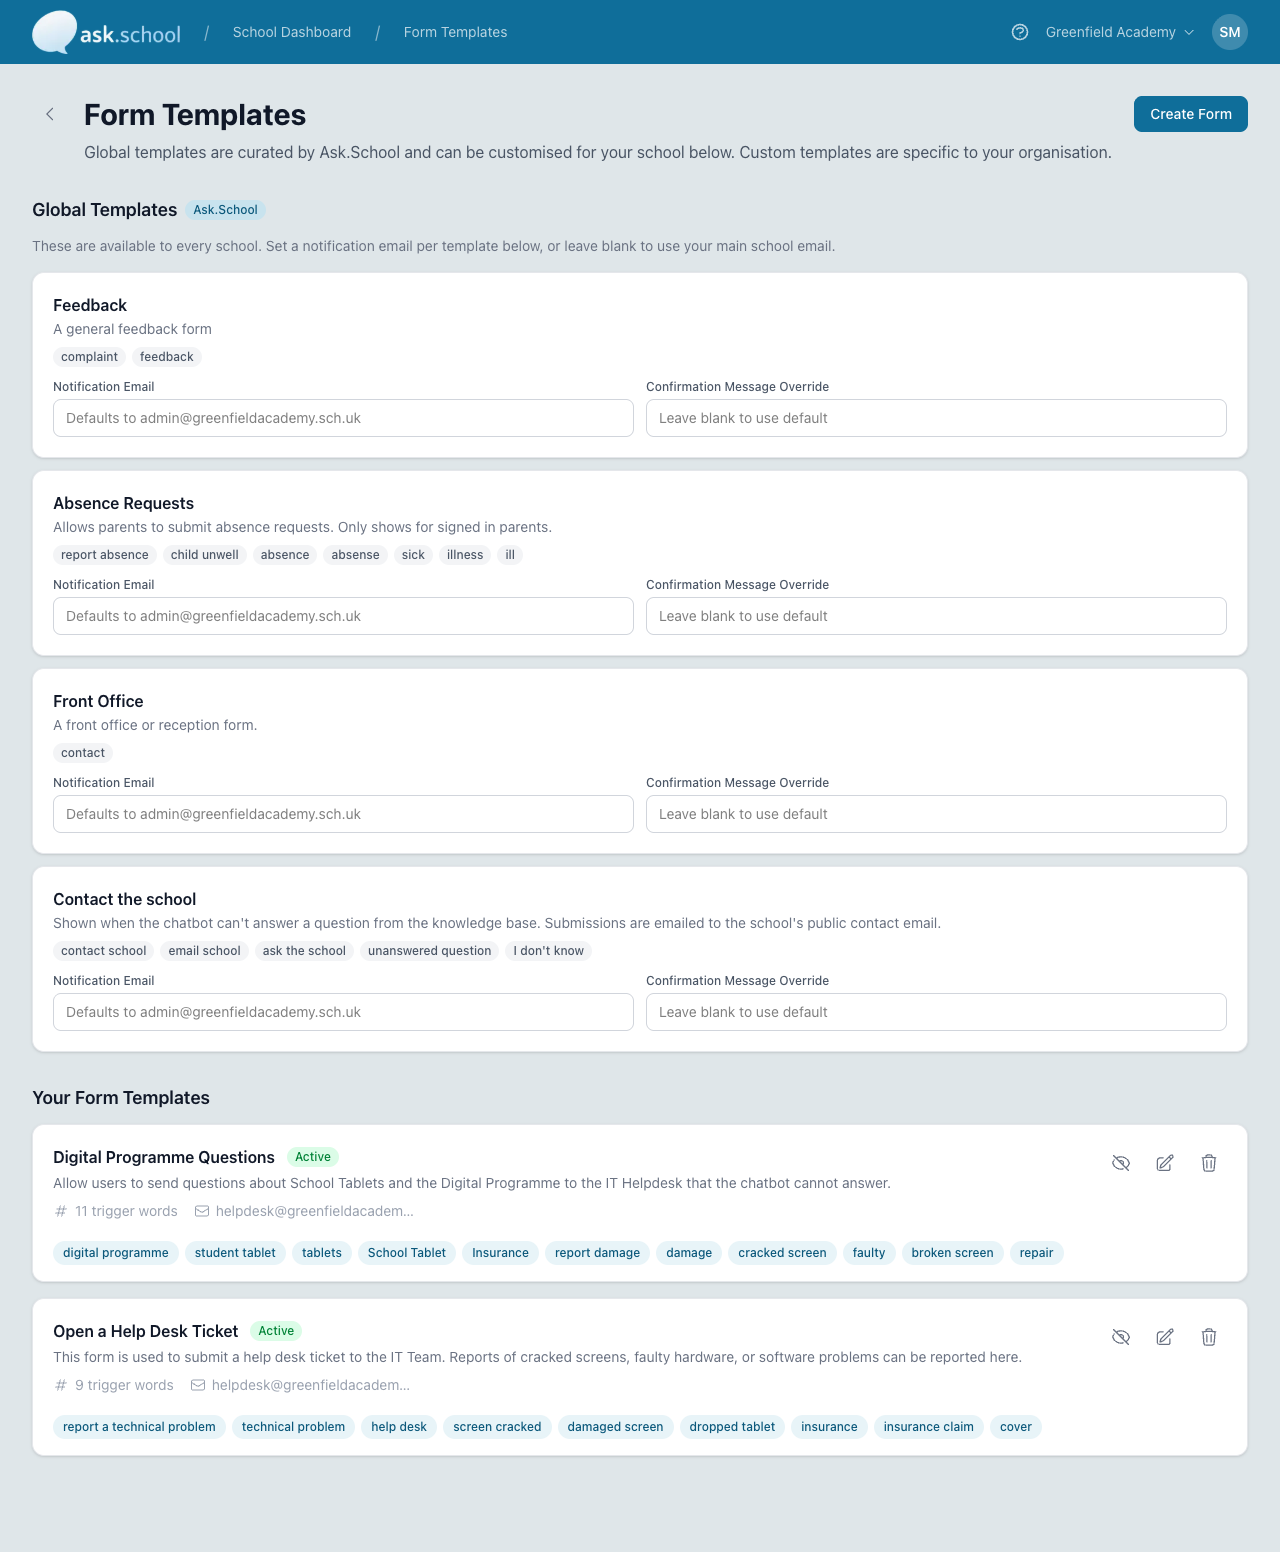 The Form Templates page
Global Templates
The four built-in templates each cover a common school workflow:
- Feedback — A general feedback form (trigger words: complaint, feedback).
- Absence Requests — Lets signed-in parents submit absence requests (triggers: report absence, child unwell, absence, sick, illness etc.).
- Front Office — A general front office / reception contact form (trigger: contact).
- Contact the school — Shown when the chatbot can’t answer a question from school knowledge (triggers: contact school, email school, unanswered question etc.).
For each global template you can set:
- Notification Email — Where submissions are sent. Leave blank to use your school’s main email.
- Confirmation Message Override — A custom thank-you message shown to the user after they submit. Leave blank to use the default.
You can’t change a global template’s name, fields, or trigger words — those are managed by Ask.School.
Your Form Templates
Custom form templates are specific to your school. Each card shows:
- Name and Active/Inactive status badge
- Description — A short summary of what the form is for
- Trigger words count — How many words or phrases trigger the chatbot to offer this form
- Notification email — Where submissions are sent
- Trigger word chips — A preview of the words/phrases the chatbot listens for
- Action icons on the right: hide/show (deactivate), edit, delete
Click + Create Form in the top-right to add a new custom template.
Creating a Custom Form
- Click + Create Form.
- Give it a clear Name and Description so the chatbot (and you, later) know what it’s for.
- Add Trigger words — the words or short phrases the chatbot should look for in user messages to know when to offer this form. Use natural variants (“report damage”, “broken screen”, “cracked screen”) so the chatbot catches the most common phrasings.
- Set the Notification Email for where submissions are sent.
- Define the form fields users will fill in.
- Save and toggle the form Active when ready.
Activating a Form for a Chatbot
A form template appearing on this page makes it available system-wide. To control which chatbots actually offer the form, open a chatbot and use the Forms tab in its editor — see Chatbot Forms for the per-chatbot view.
Good to Know
- Submissions go to the Notification Email you set, falling back to your school’s main email when blank.
- The Confirmation Message Override lets you customise what the user sees after submitting (e.g. “Thanks — we’ll respond within one school day.”).
- Custom forms can be turned off without being deleted using the eye-slash icon — useful for forms you only run during certain periods (e.g. admissions windows).
- The Absence Requests form only appears for signed-in parents — the chatbot won’t offer it to anonymous users.
Next Steps
- Chatbot Forms — Choose which forms each chatbot can offer
- Contacts & Notifications — Configure where notification emails go
- Creating Chatbots — Configure chatbot-level settings
- Conversation Monitoring — Review chatbot conversations including form-triggering messages